
Can you build a game using the Bolt IoT platform? While creating such a game would typically need expertise in electronics, data analytics and JavaScript, the Bolt IoT platform's ease of use makes development feasible for anyone. This project walks you through building a dodge-the-brick game controlled by physical buttons connected to a Bolt WiFi Module.
| Component | Quantity |
|---|---|
| Bolt WiFi Module | 1 |
| Micro-USB Cable with Power Supply | 1 |
| Micro-switches (buttons) | 2 |
| 1k Ohm Resistors | 2 |
| Breadboard | 1 |
| Male-to-Male Berge Pin Connectors | As needed |
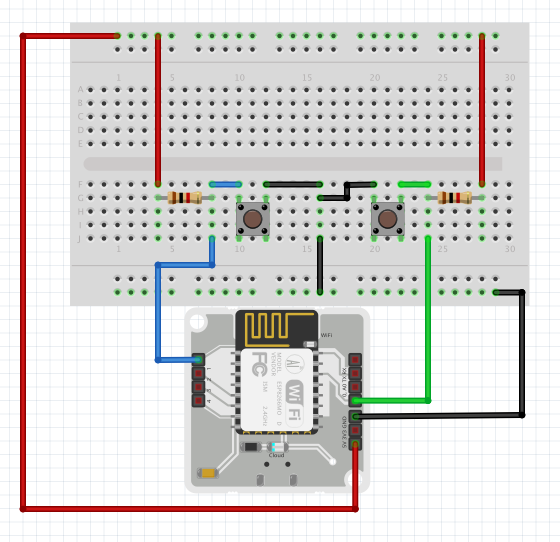
Create the circuit connections using the Fritzing diagram below. Pin 0 connects to the left button; Pin 1 connects to the right button. Other available digital pins include 2, 3, and 4.
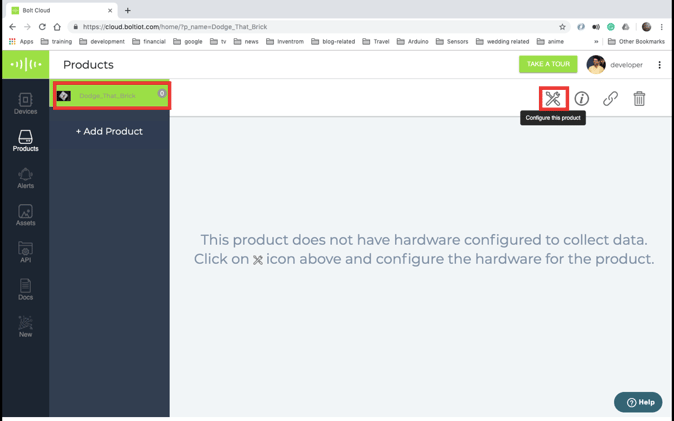
Power the system via the micro-USB cable. Link the Bolt WiFi module to your WiFi network and your Bolt Cloud account using the provided documentation.
Click the "View this device" button and start playing!

The game is built on eight key functions:
Sets up the game environment by establishing an HTML canvas object for drawing bricks and players, then initiates gameplay.
Initializes game entities (boulders and player), starts two background threads that call update_canvas and get_player_input periodically.
Terminates the game by killing the two update threads.
Stops the game, then restarts it after approximately two seconds.
Makes AJAX calls to the Bolt Cloud remote API to retrieve button states from connected pins. Updates player position based on button input. Called once every two seconds to prevent API blocking.
Renders all boulders present in the active game on the canvas.
Draws the player on the canvas. You can modify this function to substitute custom characters instead of the default red brick.
Executes the primary game control logic, called 10 times per second. The function clears the canvas, draws the player, iterates through boulder entities, increases boulder y-coordinates, calculates vertex positions, detects collision between boulders and the player, and restarts the game upon collision.
With these steps, and a little tweaking of the code, you can make any game you want using the Bolt IoT Platform. The project demonstrates the versatility of the platform beyond typical IoT applications, showing how physical buttons can interact with web-based game logic through the Bolt Cloud API.
Get the latest IoT tutorials, projects, and updates delivered to your inbox.