Build a Powerful Single Board Computer Using IoT
Single board computers have become very popular since the launch of Raspberry Pi in 2012. However, the most powerful Raspberry Pi boasts a RAM of 1GB. Here is a project on how you can use a virtual private server (VPS) of Digital Ocean to create a powerful computer with a 224GB RAM using the power of IoT.
Of course, I am talking about some extremes here for the dramatic effect, 224 GB is one of the highest memory sizes on a Digital Ocean droplet and will also have a large running cost. Yet you can optimise the memory power for your application and get an excellent system with a good ROI. Read this article which will show the steps to deploy such a system:
Instead of covering theory, I have taken a more hands-on approach where I will cover a few experiments that you can deploy with such a system. These can be altered and scaled up to your specific requirements.
Requirements
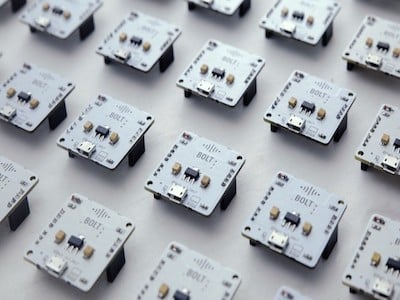
- Bolt WiFi Module and Bolt Cloud
- A VPS on Digital Ocean
- An LED
- Proximity Sensor
- Basic knowledge of Python programming language
Pre-requisites
We shall start off by creating an account on Bolt Cloud. The Bolt Cloud is the one stop to access and manage all our Bolt IoT devices. It’s quite easy to signup and link your Bolt device to your account via the Android and the iOS app.
Next, we shall create a Virtual Private Server (VPS) on DigitalOcean which is commonly known as a droplet. For this project, I shall choose the most powerful droplet with a Ubuntu 16.04.3 x64 OS costing $2.5/hour. It will give me 224GB RAM and 500 GB SSD. You can scale the droplet configuration based on your specific needs. Once you create your droplet successfully, you shall receive the credentials to SSH into your droplet via email.
We now have our base created with all the systems in place. We shall now setup the droplet so that it can communicate with the Bolt Cloud to control and monitor our Bolt device.
Setting up our droplet
Open your terminal or command line tool and type the following command and press ENTER to SSH into your droplet. Enter the password when prompted. You shall find the droplet IP & password in the email sent by Digital Ocean when you created your droplet.
$ ssh root@your-droplet-IP
You will now have remote access to your droplet. We shall install the Bolt IoT’s python library to access the Bolt Cloud API’s. Type the following commands to install the required libraries.
$ sudo apt-get install python-pip
$ sudo pip install requests
$ sudo pip install boltiot
Controlling our first device.
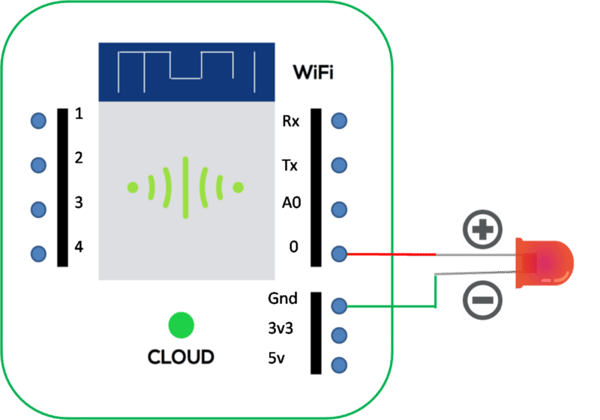
We now have all the ingredients in place to control our first device connected to Bolt. Let’s connect a LED to the Bolt WiFi Module as shown in the circuit below.
The next step is to write the python code on our droplet to control the LED. We shall create a file using the following command and write the code given below.
$ sudo nano ledcontrol.py
Type the code given below in the file created.
import json
from time import sleep

from boltiot import Bolt

api_key = "XXXXXX-XXXX-XXXX-XXXX-XXXXXX" # Your Bolt Cloud API key
device_id  = "BOLTXXXXX" # Bolt device id that you want to control

mybolt = Bolt(api_key, device_id) # Create your Bolt object

response = mybolt.digitalWrite("0", "HIGH") # Connect LED positive terminal to GPIO 0 and provide HIGH output to switch on the LED
print response

sleep(10) # Wait for 10 seconds before going to the next command

response = mybolt.digitalWrite("0", "LOW") # Provide LOW output to switch off the LED
print response
Make sure you replace the Bolt Cloud API key and the Bolt device id with your details in the code. You can find the API details through the API tab on your Bolt Cloud dashboard. Save your file by pressing Ctrl+x followed by the keys y and ENTER
Type the following command to execute the file and see if our LED switches on and off.
$ sudo python ledcontrol.py
Sensing digital input data
We shall now learn how to get the data from a sensor connected to the Bolt.
We shall use an active low proximity sensor which provides a digital input, i.e., LOW when there an obstacle is present in front of it and HIGH when no obstacle is present in front of it. The connections for the sensor are relatively simple. We shall connect the VCC pin of the sensor to 5V pin of Bolt, the GND pin to GND pin of Bolt and the O/P pin to GPIO 4 pin of Bolt. Once we are done with the connections, we shall create sensorcontrol.py file on our droplet and write the code given below. Don’t forget to update your Bolt Cloud API key and Bolt device id before saving the file.
import json
from time import sleep

from boltiot import Bolt

api_key = "XXXXXX-XXXX-XXXX-XXXX-XXXXXX" # Your Bolt Cloud API key
device_id  = "BOLTXXXXX" # Bolt device id that you want to control

mybolt = Bolt(api_key, device_id) # Create your Bolt object

while True:
    response = mybolt.digitalRead("4") # Provide LOW output to switch off the LED
    print response
    sleep(10) # Wait for 10 seconds before going to the next command
Once we execute the code, we see that it checks for any obstacle present in front of the proximity sensor every 10 seconds.
So what did we learn
The above projects are fairly straightforward. But the intention was to open your mind to the idea of using IoT and cloud computing to convert your great ideas into reality. The possibilities are infinite. With such powerful distributed computing systems combined with the Internet capabilities of Bolt hardware, you can extend this to use Machine Learning(ML) and Artificial Intelligence(AI) in your systems to build amazing things. You do not require sophisticated knowledge about IoT to get your hands dirty and can get up and running in just matter of few hours through the Bolt IoT platform. It’s also built for ML which means you can deploy ML algorithms for detecting anomalies and predicting sensor values with just a few lines of code. However, I shall cover more on that in another blog post.
I hope this article sparks your imagination and unfolds the ease of using IoT in your ideas, projects, and applications. I would appreciate your feedback and suggestions.
Want to build more such IoT and ML projects? Want to learn IoT and ML from basics?
Check out the Bolt IoT and ML training. This online video training is excellent for those who want to start with IoT and ML because it teaches you to build projects from the basics. Click on the button below to know more about the training.