


I was chilling around with my friends the other day when one of them asked me if it was possible to make a game that they could play using the Bolt IoT platform.
I told him that it was perfectly possible to make a game, but you would need an expert in electronics, data analytics and javascript to be able to pull this off.
Knowing that the USP of the Bolt IoT is the ease of use, I thought why not try making such a game, and as it turns out it is not very difficult.
Here is a screenshot of what I got done. 
Things used in this project
Hardware components

- A micro-usb cable with power supply.
- 2 micro-switches (or buttons if you prefer)
- 2 1k resistors.
- A breadboard, and a few male to male Berge pin connectors.
Software, Apps and online services

Hardware setup
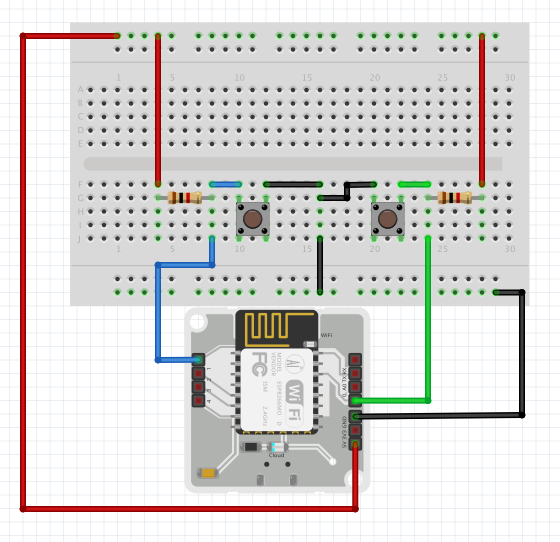
Step 1) Make the circuit connections as per the Fritzing diagram below.
NOTE: I am using pin 0 for the left button, and pin 1 for the right button. You may use any other digital pin of the Bolt WiFi module. These include pins 0, 1, 2, 3, and 4
Step 2) Power up the system, using the micro USB cable and power supply, and your hardware is ready.
NOTE: If you have not already done so, use the instructions in the given here to link the Bolt WiFi module to your wifi and your Bolt Cloud account.
Software programming
Step 1) Create a product on the Bolt Cloud.
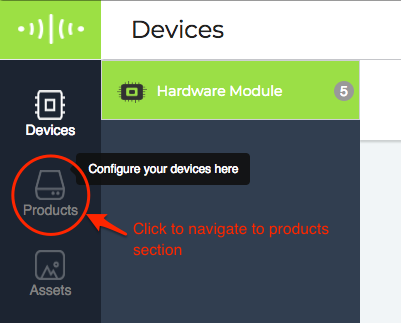
To create a new product, click on the Products tab on your Cloud Dashboard
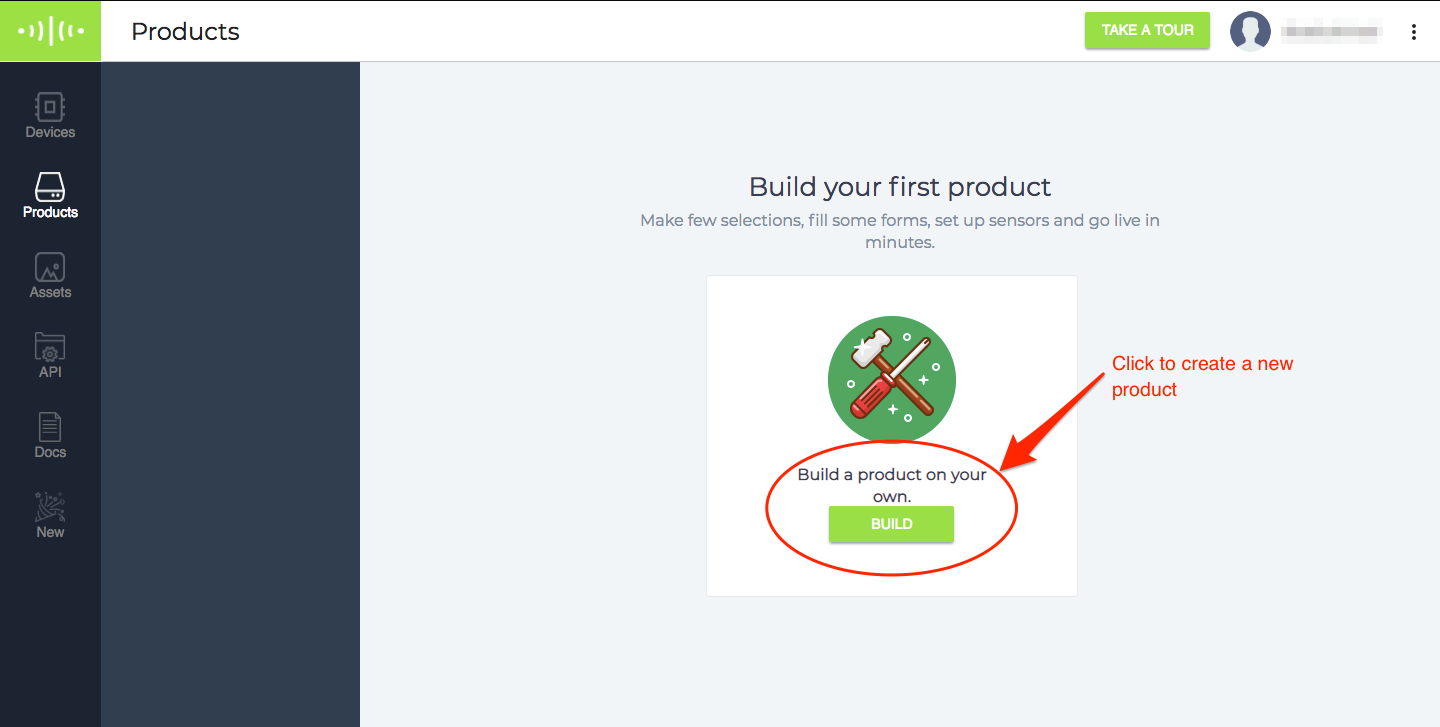
If you are creating your first product, you can click on the "Build" button as shown below.
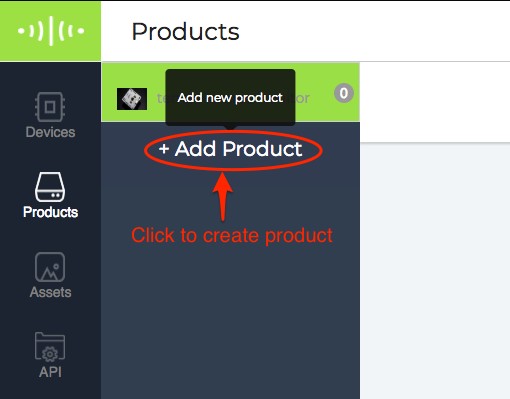
If you already have created a product and want to create more, you can click on the "Add Product" button next to your product list.
Configure the product in the popup as per your liking.
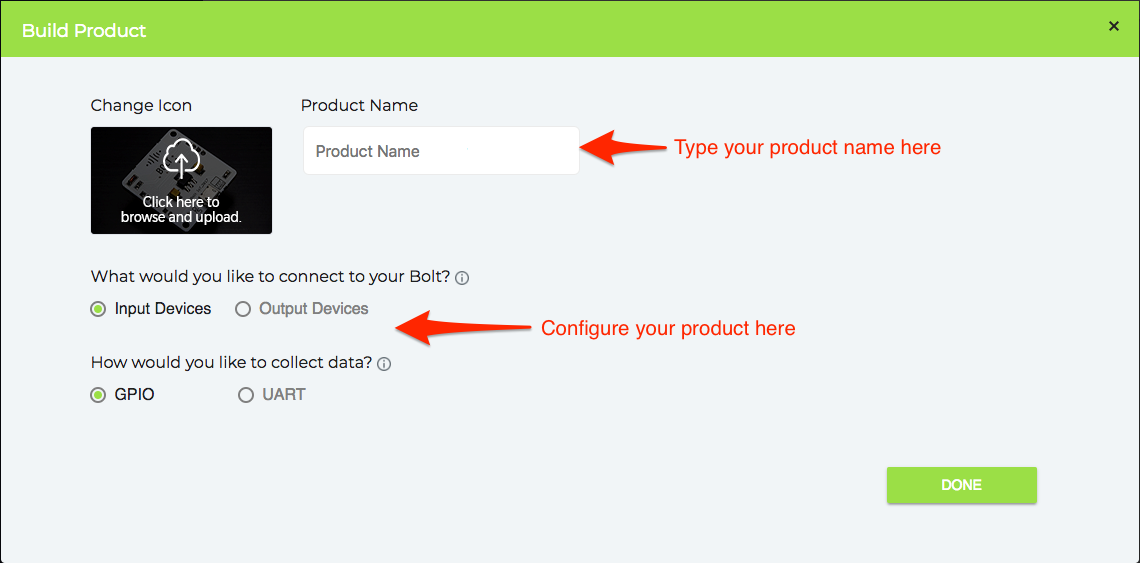
Be sure to select Input Device and GPIO.
Step 2) Configure the product.
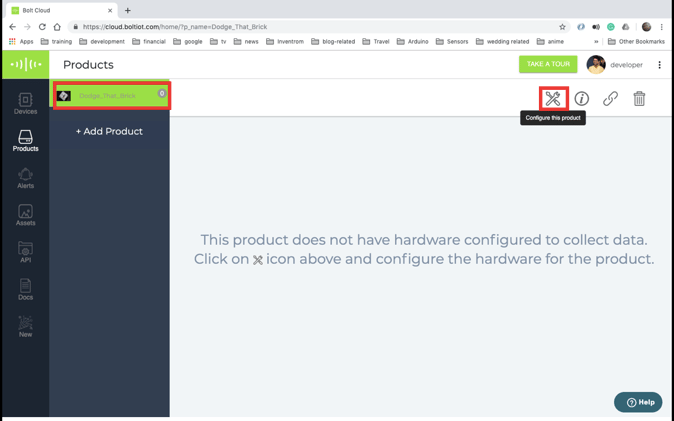
Once you have created a product, it will be listed on the Product tab in the Cloud dashboard.
To configure the product, select it in the Products tab, and click on the configure button.
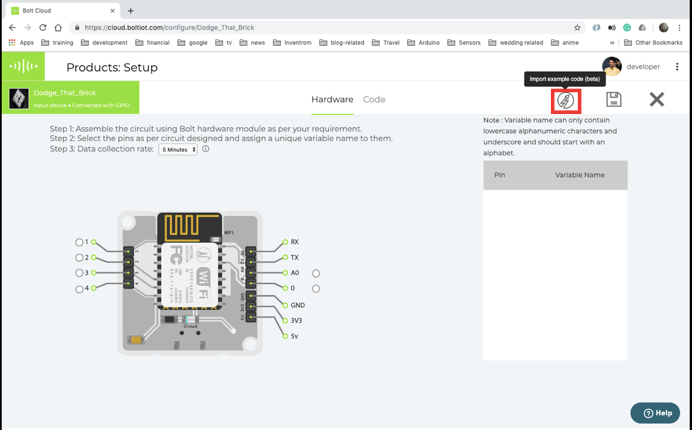
Click on the import code button
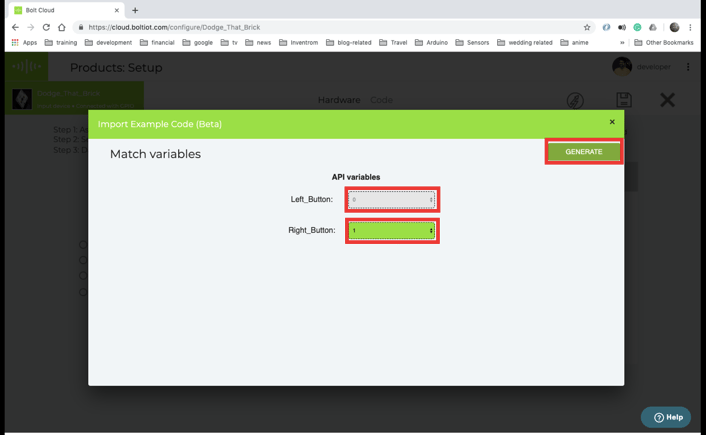
In the popup that appears, select the "Dodge Brick"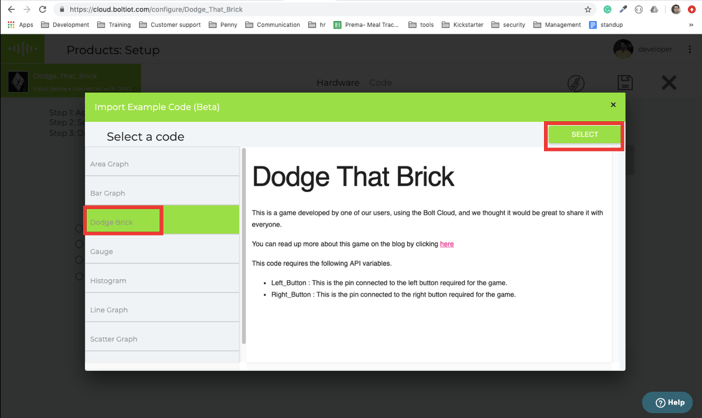
Select pin 0 for the left button, pin 1 for the right button and click on generate.
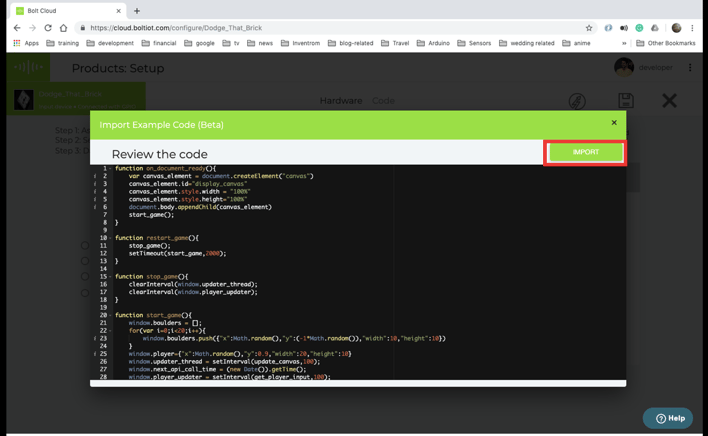
Click on the Import code button. If the browser gives you a warning to name the code before writing the code, ignore the warning.
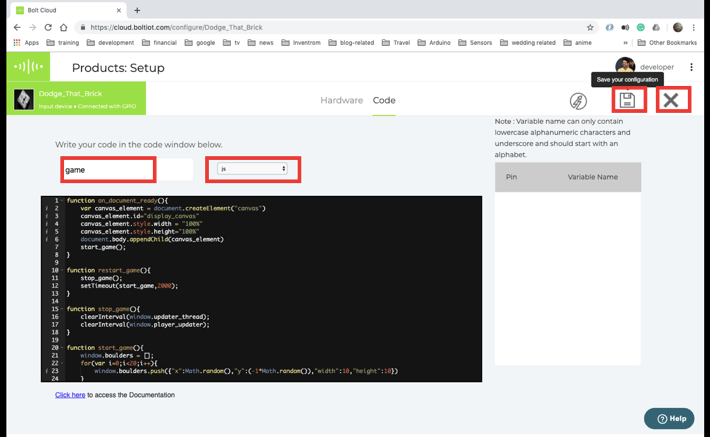
Give a suitable name for the code, (I have named it "game"), select the file type as js, then save the code and exit the code configurations.
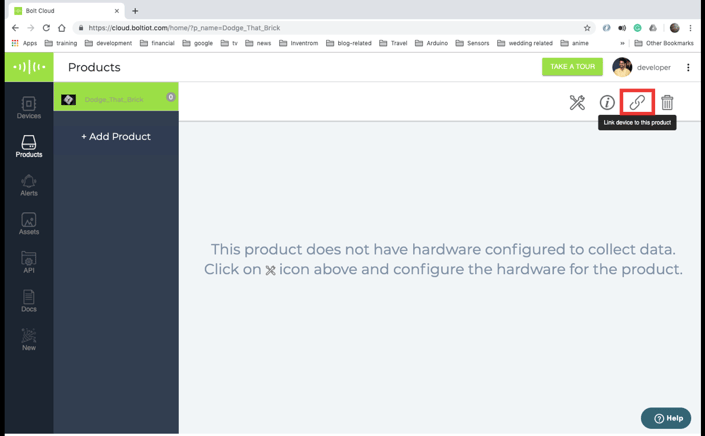
Step 3) Linking a device to the product.
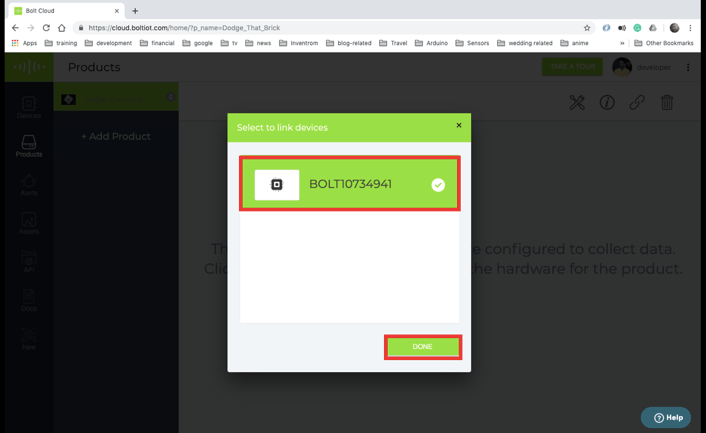
In the products section, select the product that you just configured, and click on the link button
A popup will display a list of devices that are available to you. Select the device which you used for the hardware setup and click on ok
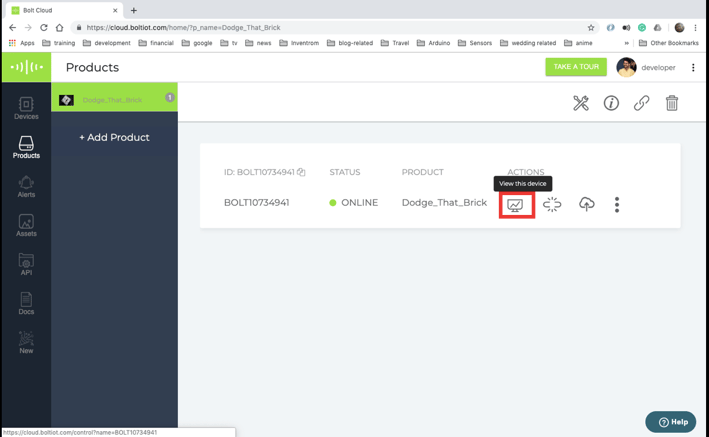
Step 4) Play the game.
To play the game, click on the "View this device" button, and start playing.
For those of you who are just interested in playing this game, this is it. You have the game ready go and play, and you can skip to the conclusion from here.
.
.
If you are still reading this, then you are the kind of person who this blog is made for.
You probably want to know, where the bricks, the gameplay, and everything came from if you didn't write the code??
Well, the code came from the nifty import code feature that the Bolt Cloud has, and here is an explanation of what the code does.
To understand the whole code, you have to understand all the functions used in the code. Here they are:
1. The On_document_ready function.
This function is responsible for setting up the environment required by the game to well run.
The game requires an HTML canvas object to draw the bricks and the player. Once this function sets up the canvas, it starts up the game for you to play using the start game function.
2. The start_game function.
This function initialises the game entities (data structures), like the boulders and the player. This function also starts 2 background threads. Each of these threads calls one of two functions update_canvas and get_player_input periodically. What these functions do is explained later.
3. The stop_game function
As the name suggests, this function stops the game by killing the 2 updated threads.
4. The restart_game function
This function first stops the game and then starts it again after about 2 seconds.
5. The get_player_input function
This function makes an AJAX call to the Bolt Cloud remote API, to get the state of the 2 pins to which you have connected the button. When the function receives the response, the function updates the player entity, depending on which button was pressed.
I have set it up so that, this function gets called once every 2 seconds to ensure that your remote APIdo not get blocked.
6. The draw_boulder function
As the name suggests, this function draws all of the boulders which are present in the game.
7. The draw_player function
This function is used to draw the player. If you want to draw some character here instead of a red brick for a player, you will have to make changes to this function.
8. The update_canvas function
This is where the main part of the game control happens.
This function is very tricky, and you should only mess around with this code, if you know what you are doing.
This function is called 10 times per second and works pretty similar to your television sets.
The function first removes everything from the canvas by painting it white.
Next, it calls the draw_player function, and makes it draw the player on the canvas.
Then it loops over all of the boulder entities, and does the follow to each of them.
- Increase the y co-ordinate of the boulder, making it move slightly down.
- It then calculates the positions of the top right, and bottom left vertex of the brick.
- It then checks whether the boulder has hit the player, by comparing the vertices of the brick with that of the player.
- If the brick has hit the player, it calls the restart_game function and has the game restarted.
Conclusion
With these steps, and a little tweaking of the code, you can make any game you want using the Bolt IoT Platform.
Want to build more such IoT and ML projects? Want to learn IoT and ML from basics?
Check out the Bolt IoT and ML training. This online video training is excellent for those who want to start with IoT and ML because it teaches you to build projects from the basics. Click on the button below to know more about the training.