

 A quick and easy system to monitor the Humidity and Temperature of your environment.
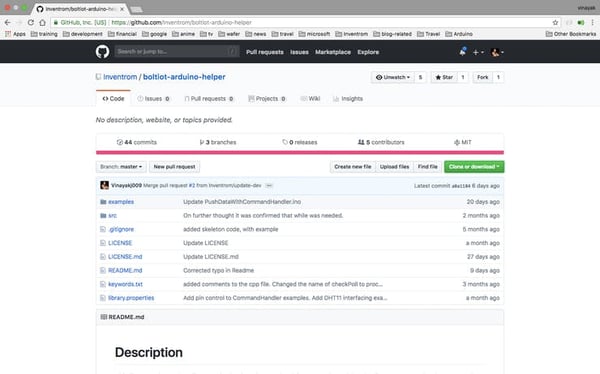
The Bolt team has recently updated the BoltIoT-Arduino-Helper library, and I thought it would be a good idea to try it out. The library now has an example on how to interface DHT sensor with the Bolt Cloud, and this project is all about doing just that.
Note - This project will be updated with ML Powered Industrial Temperature and Humidity Monitor with Prediction System soon.
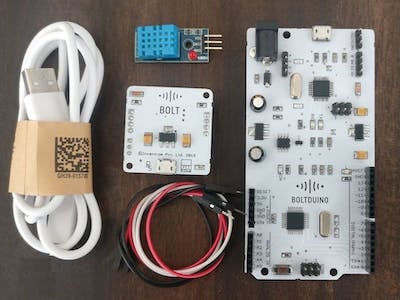
Things used in this project
Hardware components
- DHT11 Temperature & Humidity Sensor (4 pins)

- Arduino UNO & Genuino UNO
Software apps and online services

Hardware setup
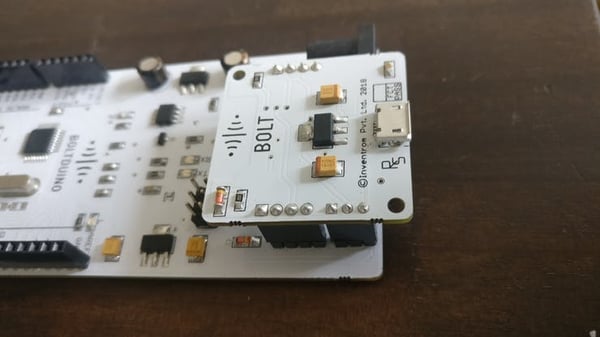
While I am using a Boltduino (A customised version of the Arduino Uno r2), the project can just as easily be done using the Arduino Uno. I have made the fritzing diagram using the Arduino UNO for the Boltduino deprived makers out there.
Step 1) Connect the Bolt to the Boltduino (Arduino).
This step is fairly easy for me, as the Boltduino has pins that hold the Bolt WiFi module. For the makers who are planning to use the Arduino however, this means connecting the Bolt module using 4 male to male Berge pin wires.
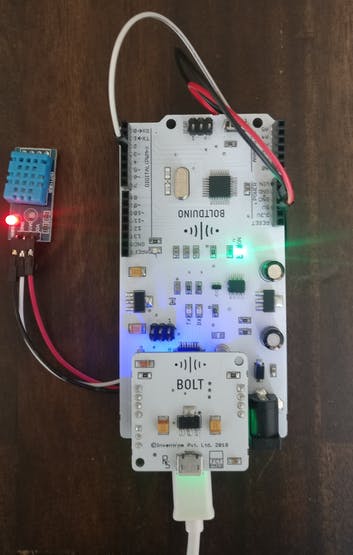
Step 2) Connect the DHT11 sensor to the Boltduino (Arduino)
 The lib
Here is a schematic of the circuit. For Boltduino just skip the part of connecting the Bolt WiFi module using the wires.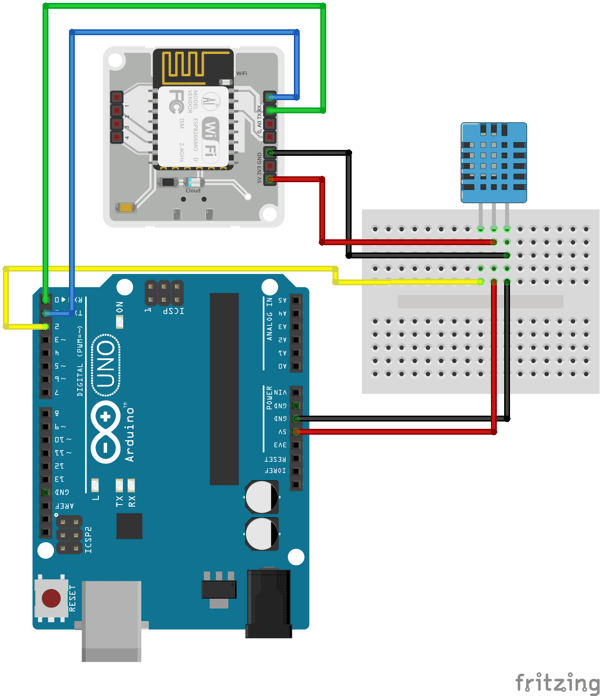
Software Programming
Step 1) Install the required libraries
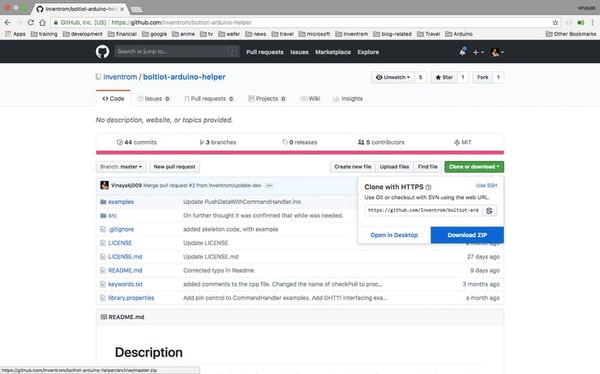
For this project, you will require the BoltIoT-Arduino-Helper, the Adafruit_Sensor, and the DHT-Sensor-library Arduino libraries.
To install the libraries just go to the link above, and click on the clone or download button.
Then click on the Download ZIP button. A zip file containing the library will be downloaded.
Once the library is downloaded, go to the Arduino IDE's tool bar, Sketck>Include Library>Add.ZIP Library...
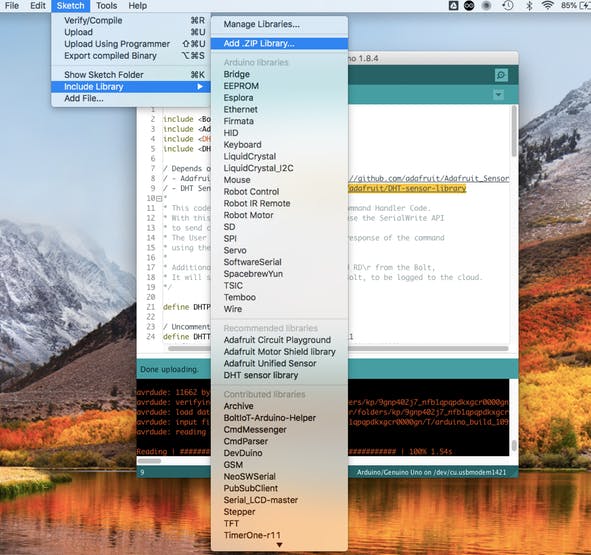
Select the library file which you downloaded earlier, and click on choose.
Remember to install ALL 3 LIBRARIES.
Step 2) Upload the code.
Go to Arduino IDE's tool bar, File>Examples>BoltIoT-Arduino-Helper>DHT2Cloud
The DHT library example will open in a new Arduino IDE window.
Connect your Boltduino to the PC and click on Upload.
CAUTION: For Arduino Uno users, remember to disconnect the Bolt module from the Arduino while uploading the code
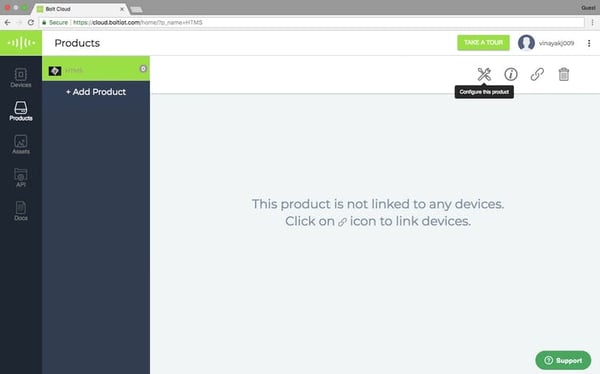
Step 3) Create a new product on the Bolt Cloud.
There have been quite a few projects developed around the Bolt WiFi module, so I believe the reader has already created an Account on the Bolt Cloud and linked their Bolt WiFi module to the Cloud account.
If that is not the case, you might want to go through this.
Ensure to select the 'Input Devices' and 'UART' option.

Step 4) Configure the product:
The steps are given in the images below.
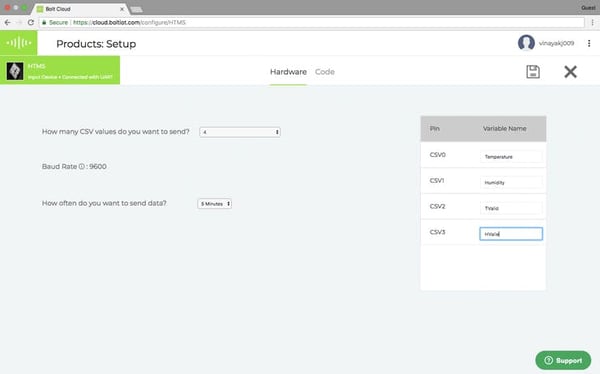
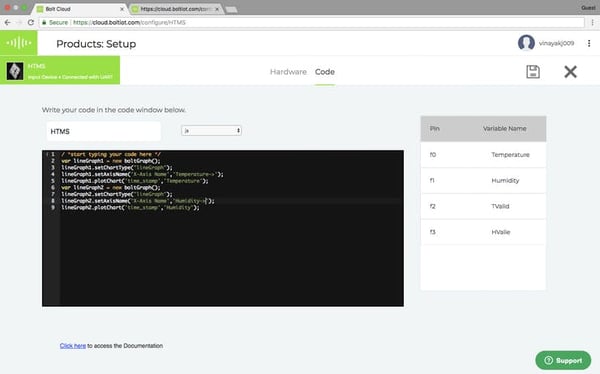
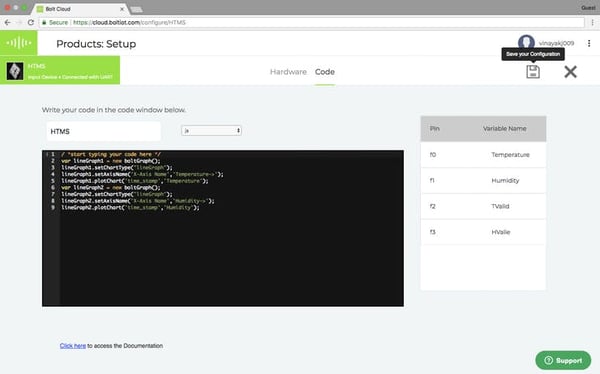
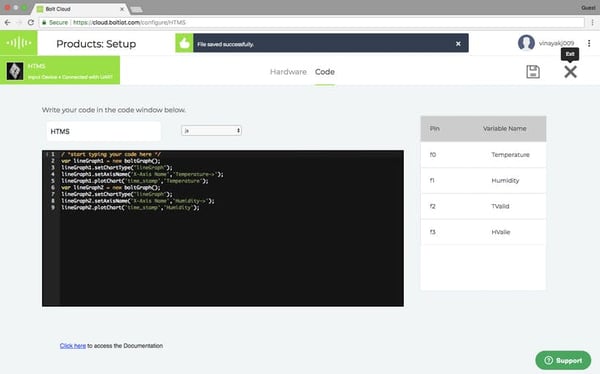
Once done save and exit the product configuration view.
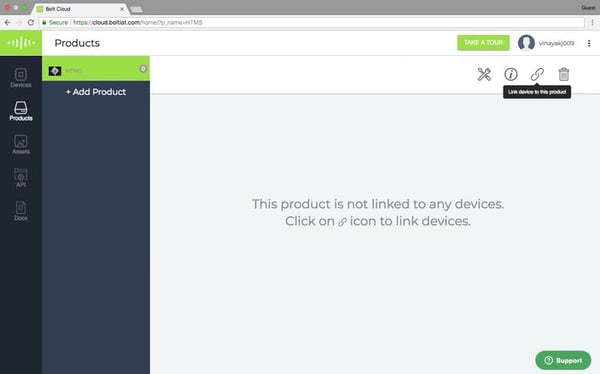
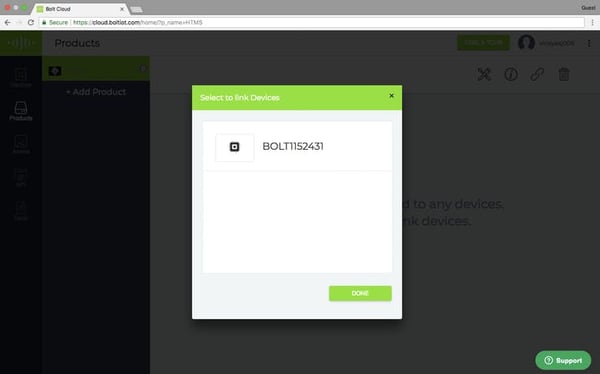
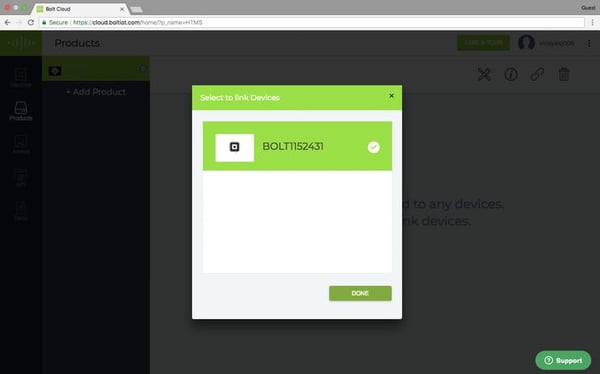
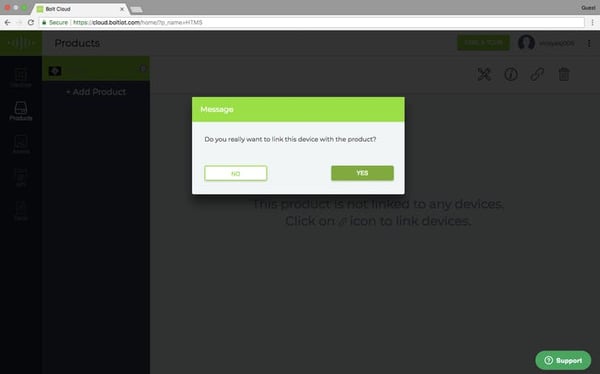
Step 5) Link the Bolt device to your new product.
Once the device is linked, remember to click on the Deploy Configurations button.
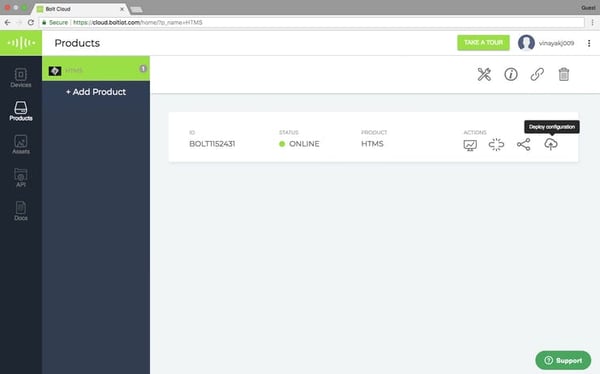
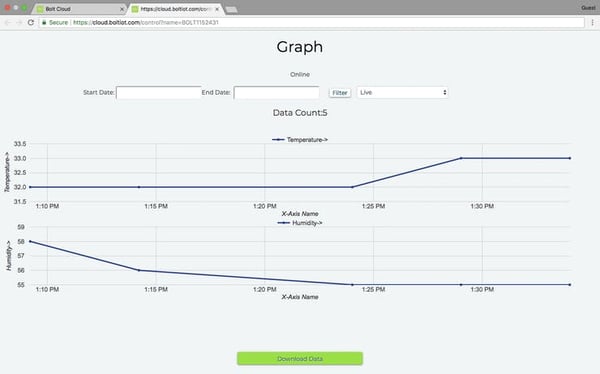
Step 6) View your device.
The Cloud polls the device for data every 5 minutes, so it would be best to leave the system be for about 20 to 25 minutes before you check.
Conclusion
After doing all of the steps, you will have a system that measures the temperature and humidity of your room every 5 minutes.
Want to build more such IoT and ML projects? Want to learn IoT and ML from basics?
Check out the Bolt IoT and ML training. This online video training is excellent for those who want to start with IoT and ML because it teaches you to build projects from the basics. Click on the button below to know more about the training.