Ever had to work with a project where you had moving parts?
No, I mean quite literally moving parts which you had to control, using some form of a servo motor?
If you have worked with motors and especially servo motors in the past, then you know the pain which in involved in designing the circuit that can control these motors. For the newbie, servo motors are a class of motors where you can tell the motor, what position it should move to or what speed it should move, and it's internal mechanism uses some form of feedback to ensure that the required position or velocity is achieved. This help in reducing your efforts in ensuring that that work you have given the motor is done.

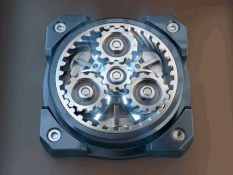
There are quite a few type of servo motors available in the market, but some of the most popular servo motors allow you to control their position or velocity by having to pass to them pulse width modulated (PWM for short) signal. Checkout the photo below for an example of such a motor.

The way you tell these motors what angle (position) it should try to maintain, you have to send it a PWM signal every 20 ms, where the width of the pulse is proportional to the angle which you want the motor to stop at. To set an angle of 0 degrees, you will send a high signal for 1 ms, and a low signal for 19 ms, and to set an angle of 180 degrees, you will send a high signal for 2 ms and a low signal for 18 ms.

If these calculations are too confusing for you, then don't bother about it, as the Bolt IoT platform, has simplified this by giving a new API for it's latest firmware update '1.4.1', and you can use the steps in this blog to quickly control your servo motor.
NOTE: To be able to use this feature, you have to subscribe to the Bolt Cloud Pro plan. Click here to upgrade your account now.


Step 1) Setup the Bolt WiFi module to connect to your Bolt Cloud account. You can find detailed steps here.
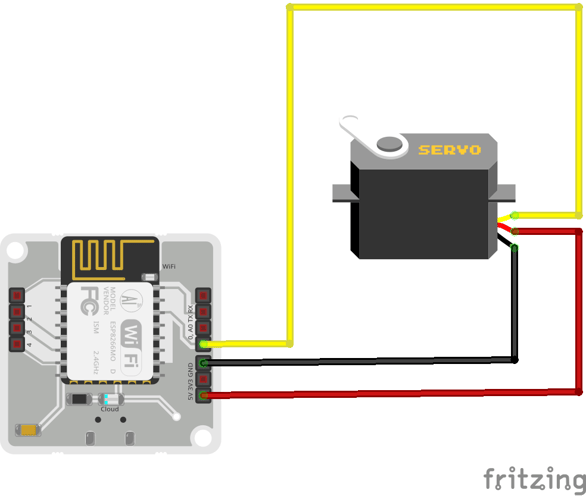
Step 2) Connect the jumper cables from the Servo motor to the Bolt device in the fashion given below:
The servo motor should have three wires coming out of it which may be Black(GND), Red(5V) and White(PWM input) in colour.
For further clarity, refer to the Fritzing diagram.
Step 3) Power up the system, by connecting the micro USB to the device.
Step 1) Building the API link:
To be able to control the servo motor, you need to build a link which you should call to run the API.
In the case of the servo motor control, the link is of the form
https://cloud.boltiot.com/remote/<API key>/servoWrite?pin=<pin>&value=<angle>&deviceName=<device name>Once the you finish building the link, it should look something like the following:
https://cloud.boltiot.com/remote/44b2de6b-7e68-40e7-a27f-814b58afe008/servoWrite?pin=0&value=0&deviceName=BOLT1257632The above link will set the motor position to 0 degrees.
https://cloud.boltiot.com/remote/44b2de6b-7e68-40e7-a27f-814b58afe008/servoWrite?pin=0&value=90&deviceName=BOLT1257632The above link will set the motor position to 90 degrees.
https://cloud.boltiot.com/remote/44b2de6b-7e68-40e7-a27f-814b58afe008/servoWrite?pin=0&value=180&deviceName=BOLT1257632The above link will set the motor position to 180 degrees.
Step 2) Running the API call:
To run the API call, simply run the paste the API link that we made earlier into the address bar of a browser, and click on go, and watch the servo motor move.
These are the things you have to remember while having to control a servo motor with the Bolt WiFi module.
With the Bolt Cloud PRO API calls, you can start controlling your servo motor within minutes.
Check out the Bolt IoT and ML training. This online video training is excellent for those who want to start with IoT and ML because it teaches you to build projects from the basics. Click on the button below to know more about the training.

Get the latest IoT tutorials, projects, and updates delivered to your inbox.