
Make your own alarm clock to wake you up in the morning using the Bolt WiFi module.
Story
Lying in the bed every morning and you realise something, I've overslept! Don't you wish you could create an alarm system that would wake you up every morning?
Using just a Bolt device and a Buzzer and an online service called Integromat, you can build one yourself.
Here is how the system works
The system works by setting up a scenario on the Integromat service which activates the buzzer connected to your Bolt device activating the alarm at a set time everyday.
Things used in this project
Hardware components -
- Bolt IoT WiFi module
- Buzzer
- Connecting wires x2
You can get most of these components with the  . The kit is also included as part of the 'Bolt IoT and ML hands-on training'.
Software components -
- Bolt Cloud
- Integromat
Hardware connections
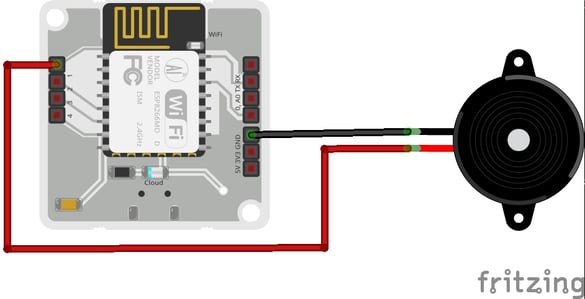 Connect the buzzer to the Bolt WiFi module using the above image as a guideline,
| Bolt WiFi module |
|
Buzzer |
| GND |
<--> |
-ve pin |
| Digital pin 1 |
<--> |
+ve pin |
Lets Build
Step 1 : Gather the components
- Register your Bolt device to the Bolt cloud.
- Create a free account on Integromat.
Step 2 : Connect the components
- Connect the longer end(+ve end) of the Buzzer to pin 1 of the Bolt.
- Connect the shorter end(-ve end) of the Buzzer to the GND pin of the Bolt.
- Power on the Bolt device using a micro-USB cable.
Step 3 : Create the flow
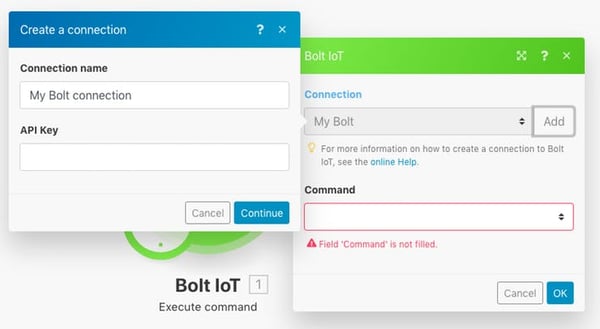
- Log in to your Integromat account.
- Click on Create a new scenario.
- Search and select "bolt iot".
- Enter your API key by clicking on the Add button as shown below. You can find your API key on your Bolt Cloud dashboard.
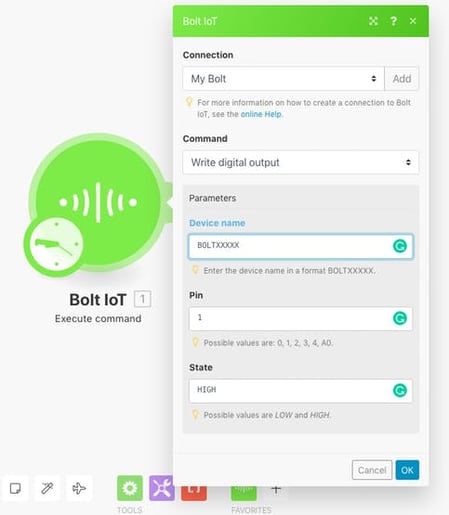
- Enter the Device ID and select pin 1 as the Buzzer will be connected to this pin.
- Choose the state as HIGH as we want the Buzzer to turn on.
- Next, we want the buzzer to ring for a few seconds at least. So we need to add a delay before switching off the Buzzer again.
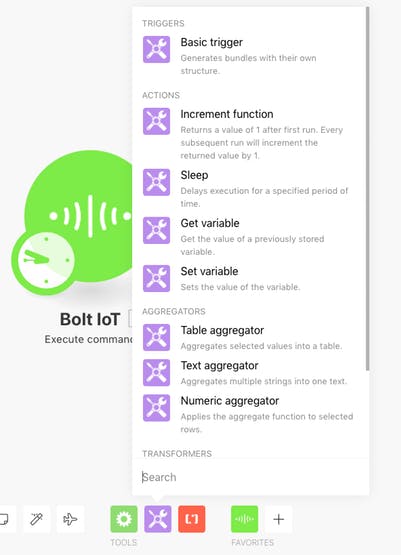
- Click on the tools option and select sleep.
- Enter the number of seconds the buzzer should ring for in the input box. For me, 5 seconds of high intensity buzzer sound is enough to wake me up.

- Click on adding a new module and choose Bolt IoT again. Now, in this module, we are going to switch off the Buzzer by sending a LOW to the Buzzer.
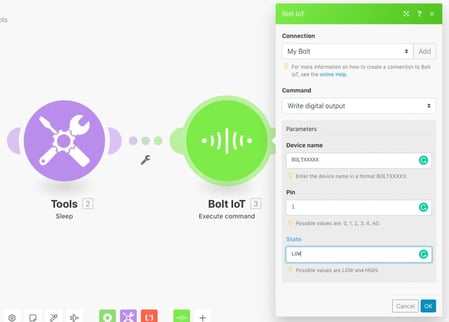
- Enter the same Bolt ID and Pin, but this time, set the state as LOW.
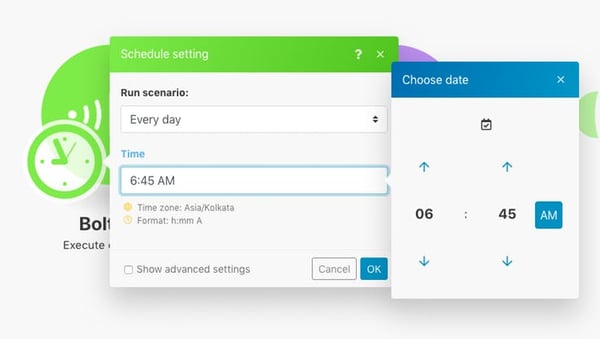
- So far, we have set up the scenario to ring the buzzer. Now, we will give it some context in the form of the time to ring.
- Click on the little clock icon on the initial Bolt module. This is the scheduling option. Choose the time that you want the alarm to ring and click on OK.
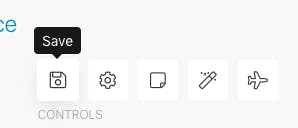
- That's it, you have successfully set up your alarm scenario. Don't forget to save your scenario.
- To test if the buzzer actually works, click on the "Run Once" button. The buzzer should ring for 5 seconds and then switch off.
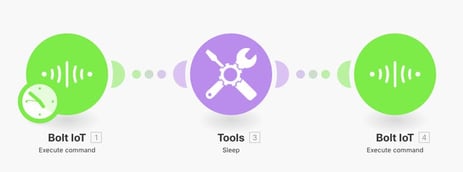
- In the end the whole scenario should look like this,
That's it, the project is ready now!
Now, this should be loud enough to wake up your SO also along with your neighbours, just don't smash your Bolt alright?
Want to build more such IoT and ML projects? Want to learn IoT and ML from basics?
Check out the Bolt IoT and ML training. This online video training is excellent for those who want to start with IoT and ML because it teaches you to build projects from the basics. Click on the button below to know more about the training.